IMPORTANT!
- Doors must be bored prior to installing locks. OpenKey can provide a cut template upon request.
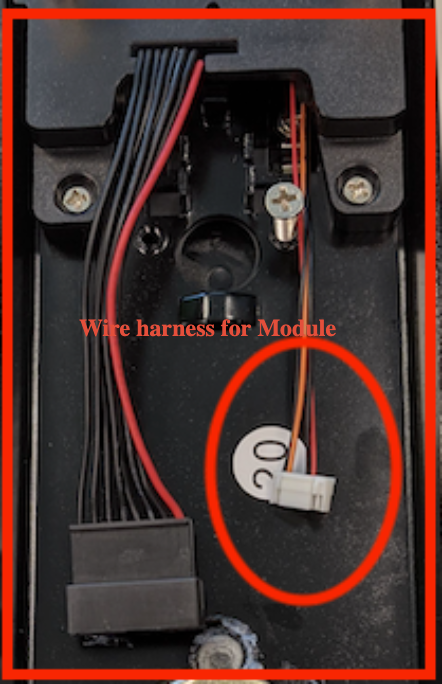
- If using modules, you must program each module, one by one as you install them, separately by using the included Android device. If you install all the modules prior to programming, the v3 Programmer application will not be able to identify reliably which module you are trying to program.
Requirements:
- Phillips head screwdriver (possibly both a PH1 and PH2 size)
- Torx screwdriver (TORX25, 6-point star-shaped pattern)
Components:
- Front escutcheon (handle assembly with reader)
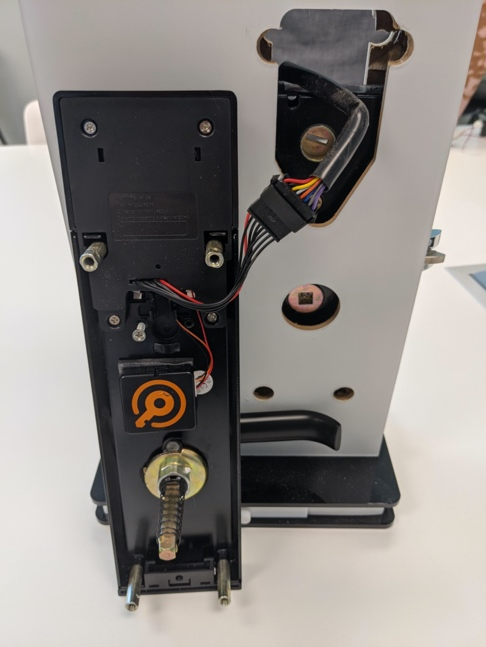
- Back escutcheon (handle assembly with battery access)
- Deadbolt turner spindle (singular, long slender)
- Batteries (Duracell Procell AA preferred, included with purchase)
- Battery cover (includes battery cradle harness & connector)
- Key Cylinder insert (needs to be installed onto Front escutcheon during install)
- Cylinder mounting screws (two)
- Door spindle springs (two, might be inset inside handles)
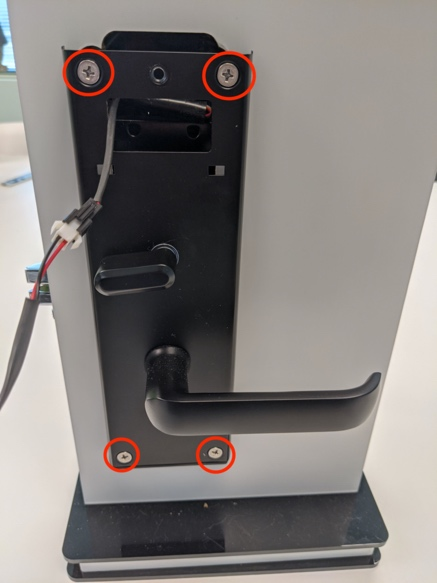
- Faceplate mounting screws (four)
- Door spindles (two, one per handle, short thick)
- Rubber plug
- Mortise forend/ beauty plate (caps mortise, post mortise installation)
- Mortise forend/ beauty plate screws (two)
- Mortise (has motor harness & power harness, installed into door pocket)
- Mortise mounting screws (two)
- OpenKey Module (optional)
Lock Installation Video:
- Insert the mortise into the side of the door, ensuring it is the correct direction. Feed the wires at the top of the mortise through the mortise bore whole and out of the top bore hole.
- Affix the mortise into the side of the door using the mortise screws.
- Attach the forend/mortise plate and fix it in with the forend screws.
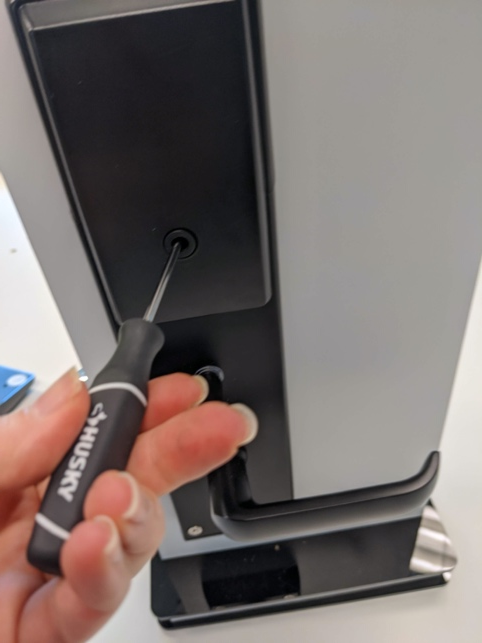
- On the inside of the front faceplate, remove the screws immediately under the cabling on either side of the cylinder hub.
- Affix the cylinder to the cylinder hub and replace the screws.
- Connect the wires on the inside of the front faceplate to the mortise wires through the top bore hole. Tuck the wires to ensure they are not pinched, as this will create issues.
7. Insert a square bar into the handle boar hole, lining it up with the spindle hole. Place a spring over the square bar.
8. Line up the faceplate, ensuring the components connect in to their appropriate places.
9. On the other side of the door, a square bar into the handle boar hole, lining it up with the spindle hole. Place a spring over the square bar.
10. Insert the turn piece square bar on the inside of the back faceplate aligning it with the deadbolt lever.
11. Line up the back faceplate, ensuring the deadbolt lever is in the right position and the battery cable is accessible through the top battery hole.
12. Use the faceplate screws to affix the two sides of the lock to the door.
13. Check the installation by trying out the deadbolt lever and handles.
14. Install the batteries into the battery cover, ensuring the positive and negative sides are correlated correctly. Procell batteries are recommended as they are designed for commercial use.
15. Connect the cable to the battery case cable.
16. Line up the battery case and affix the case with a screw